") 如何制作和控制一只仿生手
如何制作和控制一只仿生手
這個項目介紹了如何制作和控制一只仿生手。作者最初受到Instagram上一個視頻的啟發(fā),該視頻展示了使用MPU6050傳感器追蹤手部動作并在屏幕上顯示3D模型。作者決定將這個想法進(jìn)一步發(fā)展,使用OpenCV來控制一只真實的仿生手。
大家好,在這篇教程中,我想和大家分享一下如何制作并控制一只自己的仿生手。這個想法源于我在無意中刷Instagram時,看到一段短視頻:一個人通過MPU6050傳感器來跟蹤手部運動,并在屏幕上顯示手的3D模型。因為我之前也使用過這個傳感器,所以覺得這個我也能完成。我一直喜歡將編程與現(xiàn)實世界結(jié)合起來,于是我想,為什么不將這些測量數(shù)據(jù)傳輸?shù)揭粋€真實的仿生手上呢?后來我決定,使用OpenCV代替MPU6050會更加高效,部分原因也是我想借此機會學(xué)習(xí)另一種技能。
特別感謝Ga?l Langevin,他在InMoov項目[1]中設(shè)計了這個手的模型,并慷慨地分享了出來。
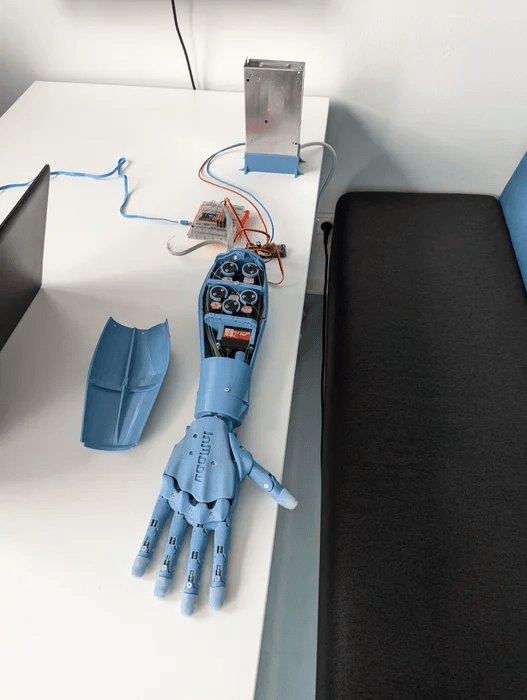
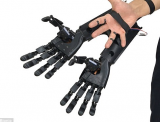
效果展示
所需材料
InMoov手及前臂
- 3D打印機
- 焊接工具
- 約1公斤的耗材(PETG 或 ABS 或 PLA)
- 3米釣魚線(能承重約20公斤)
- 5根擴展彈簧(3/16″ x 1-3/4)
- RTV硅膠 Ecoflex 00-10
螺絲、螺母和螺栓
- 10個M2x4平頭木螺絲
- 10個M3x4mm平頭螺絲
- 4個M3x12mm平頭木螺絲
- 20個M3x12mm平頭螺絲
- 25個M3x16mm平頭螺絲
- 10個M3x20mm平頭螺絲
- 35個M3螺母
電子元件
- 1塊ESP32 38-pin 開發(fā)模塊
- 1根micro USB數(shù)據(jù)線
- 5個線性霍爾傳感器(49E)
- 5個直徑2.5mm x 1mm的磁盤磁鐵
- 1根16芯彩排線
- 5個1k電阻
- 5個2k電阻
- 6個伺服電機(JX PDI-6225MG-300)
- 1塊定制PCB(可選)
- 1個電源(理想情況下為6V或5V,功率約100W,因為每個伺服電機的電流可達(dá)3A)
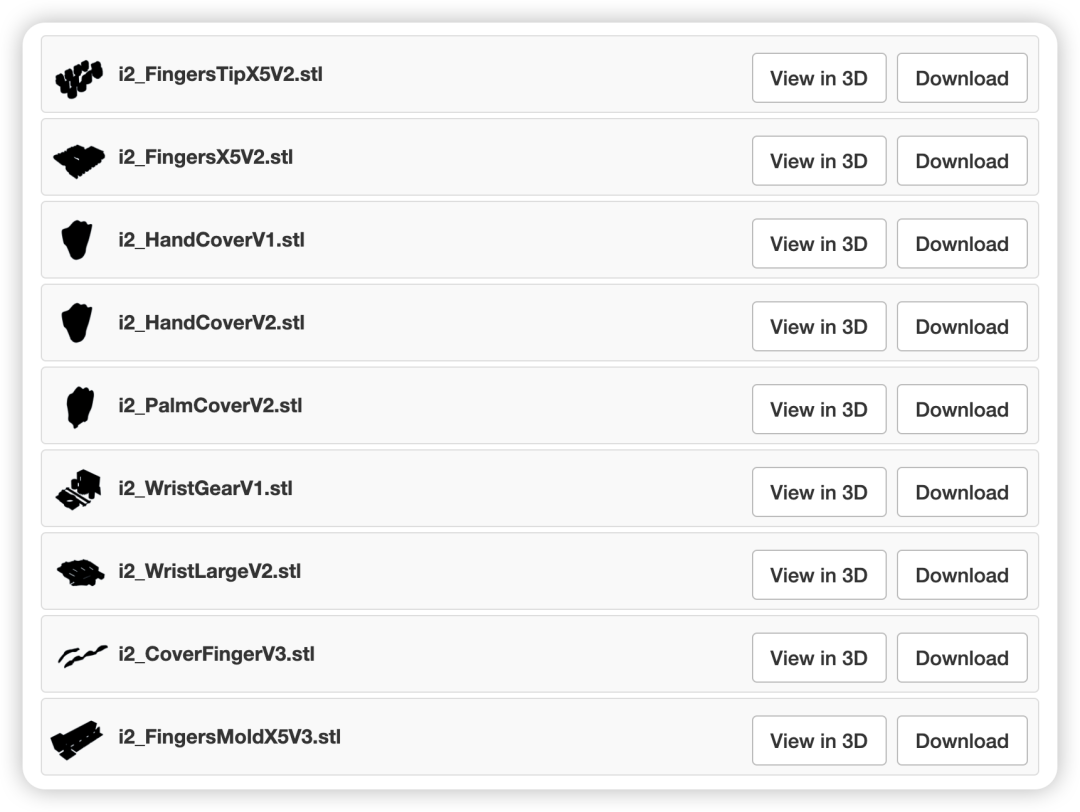
步驟1:3D打印手部

3D打印文件見文末。
打印時,建議使用稍高的填充率(約30%),以提高部件的耐用性。關(guān)于材料,InMoov使用的是ABS,不過如果你沒有穩(wěn)定打印ABS的設(shè)備,PETG或PLA同樣可以使用。
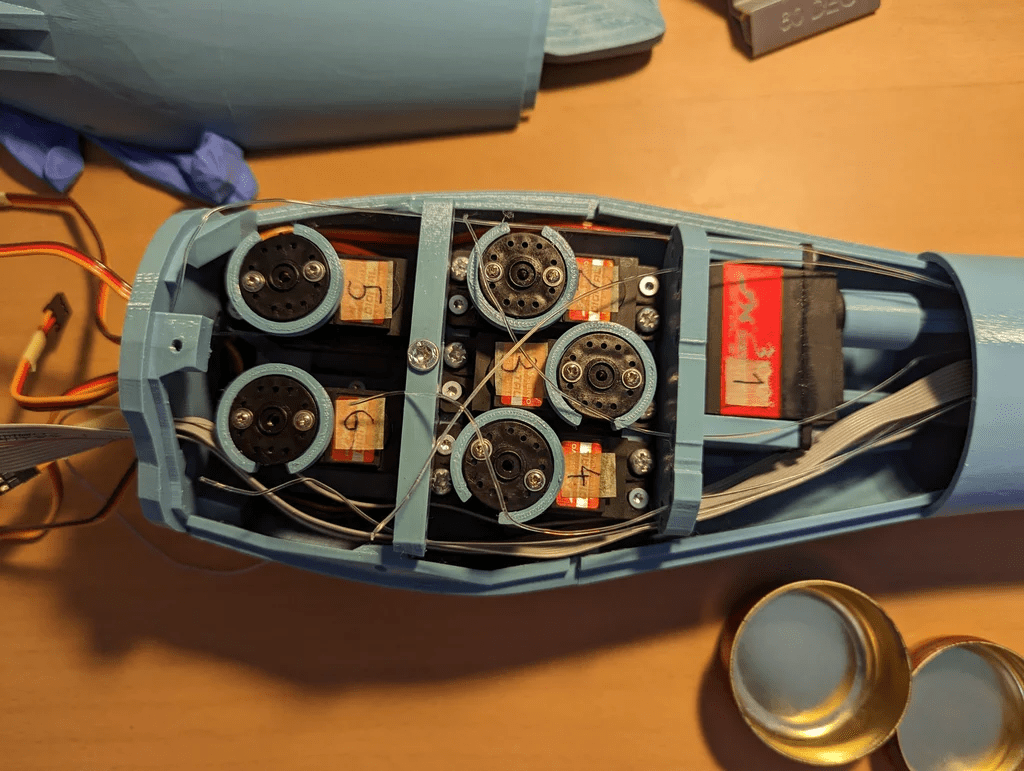
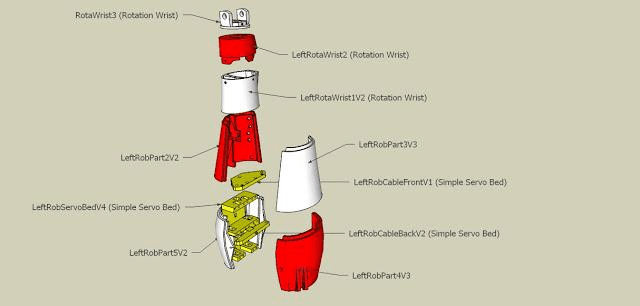
步驟2:3D打印前臂
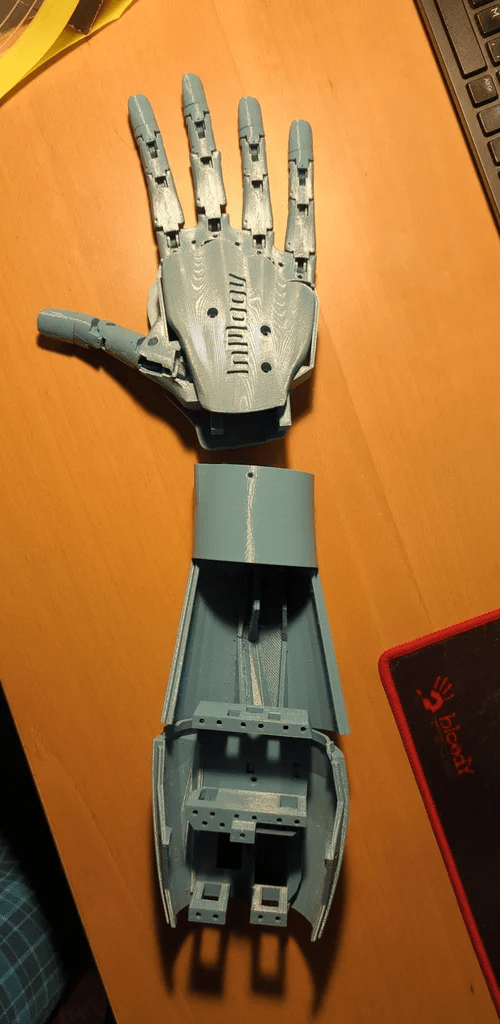
同樣地,手部所需的文件如下,并且也在inmoov STL零件庫[2]中。請注意,在inmoov零件庫中有原版inmoov機器人的文件。這個手是i2版本,因此你只需要前臂部分的一些零件。另外一個需要注意的是,當(dāng)打印Bolt_entretoise7時,你只需要中間的螺栓和夾子(其他部分是為舊版手設(shè)計的)。

3D打印文件文末下載。
你還可以打印一個我自己在Fusion 360中設(shè)計的小展示支架。
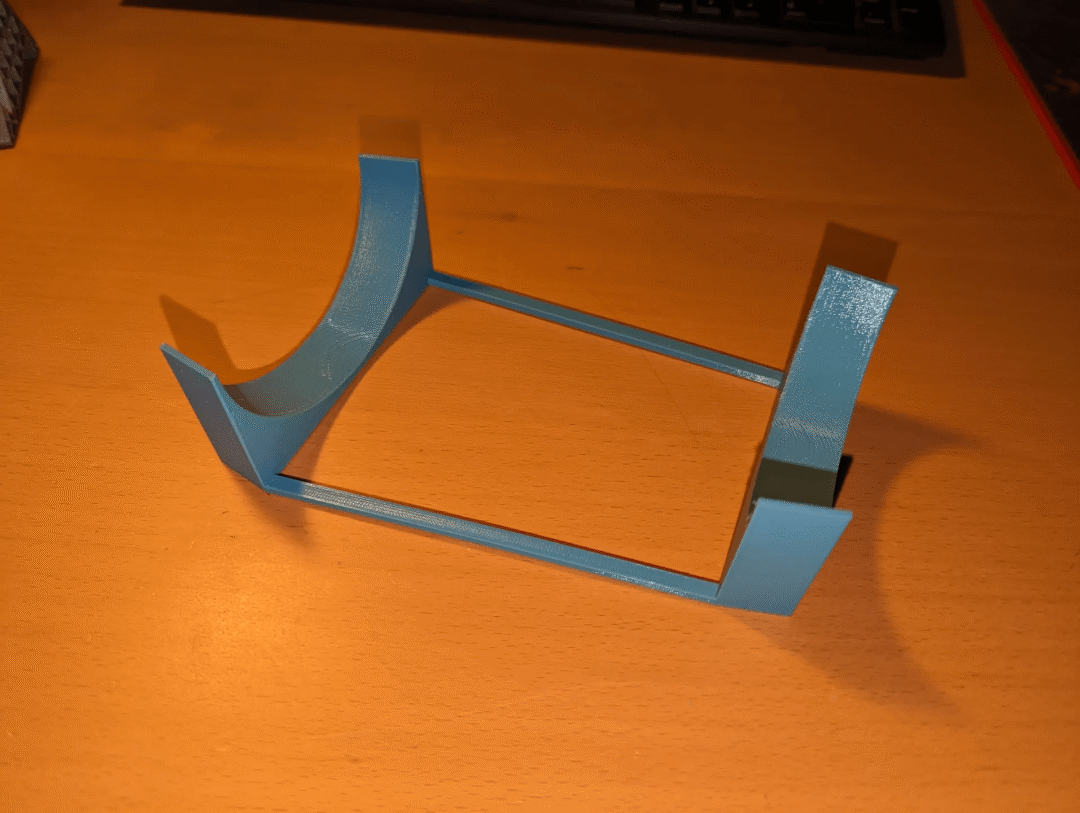
鏈接:https://www.printables.com/model/593999-inmoov-hand-stand?lang=cs
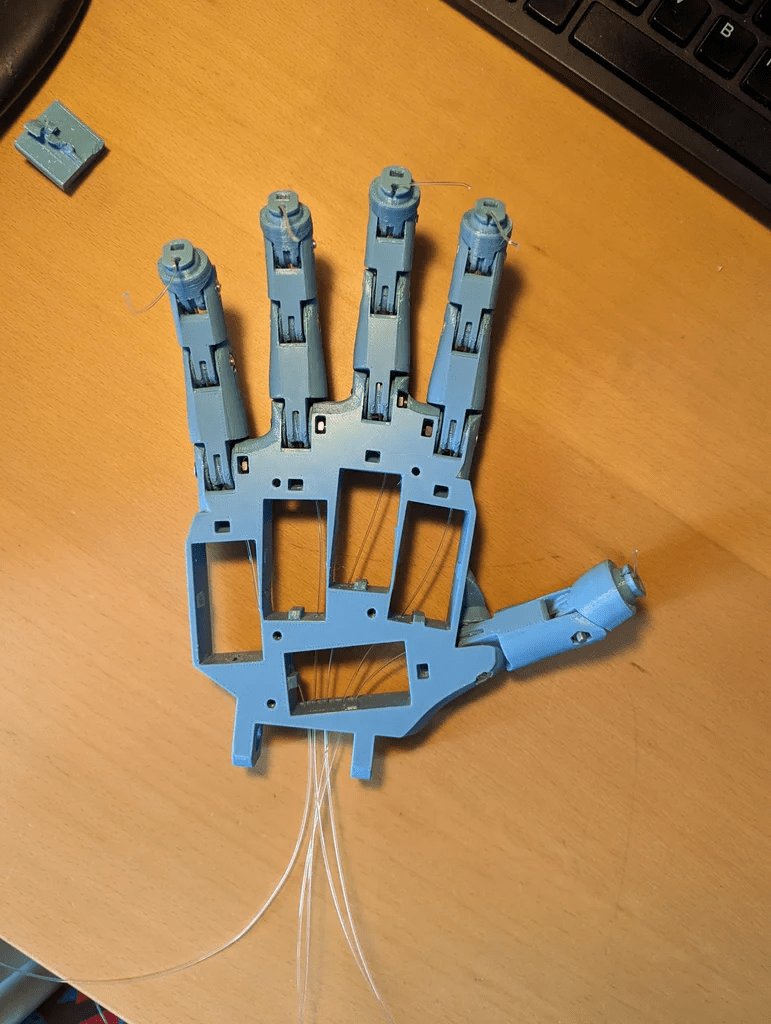
步驟3:組裝
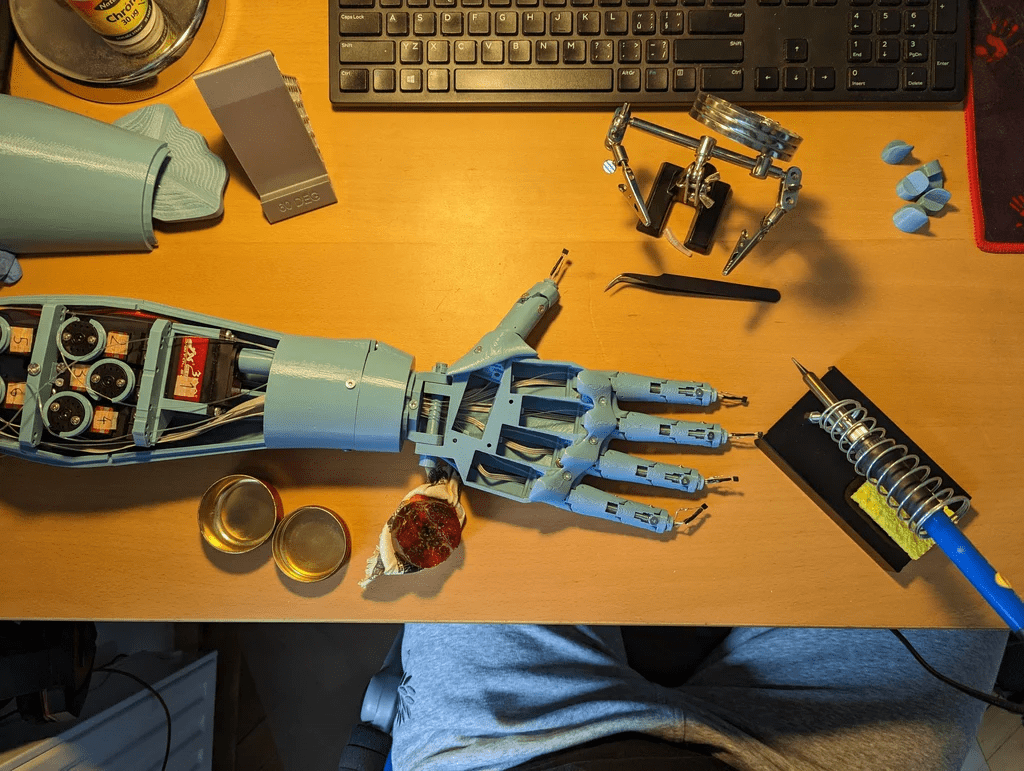
在組裝時,可以參考InMoov提供的hand i2[3]與前臂[4]的教程,這些教程非常詳細(xì),提供了所有必要的信息。
初始部件的組裝相對簡單,只需用螺絲將整個設(shè)計固定在一起。稍微復(fù)雜的部分是確保釣魚線的布置不打結(jié),以及將霍爾傳感器正確安裝在指尖。
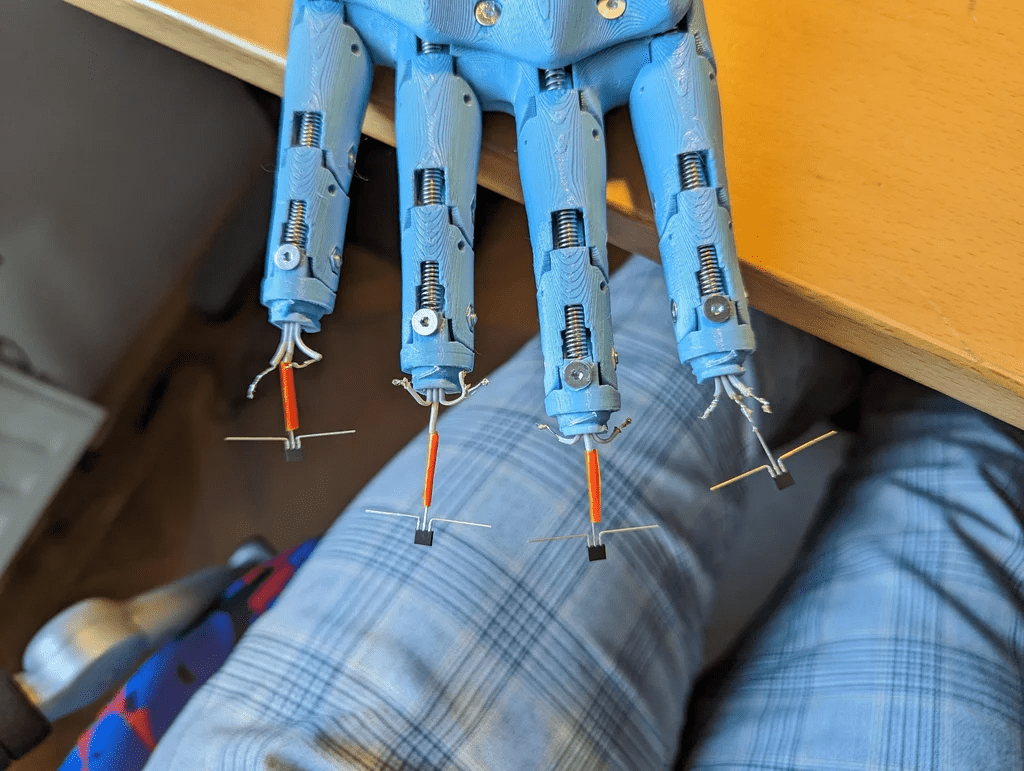
步驟4:硅膠指尖
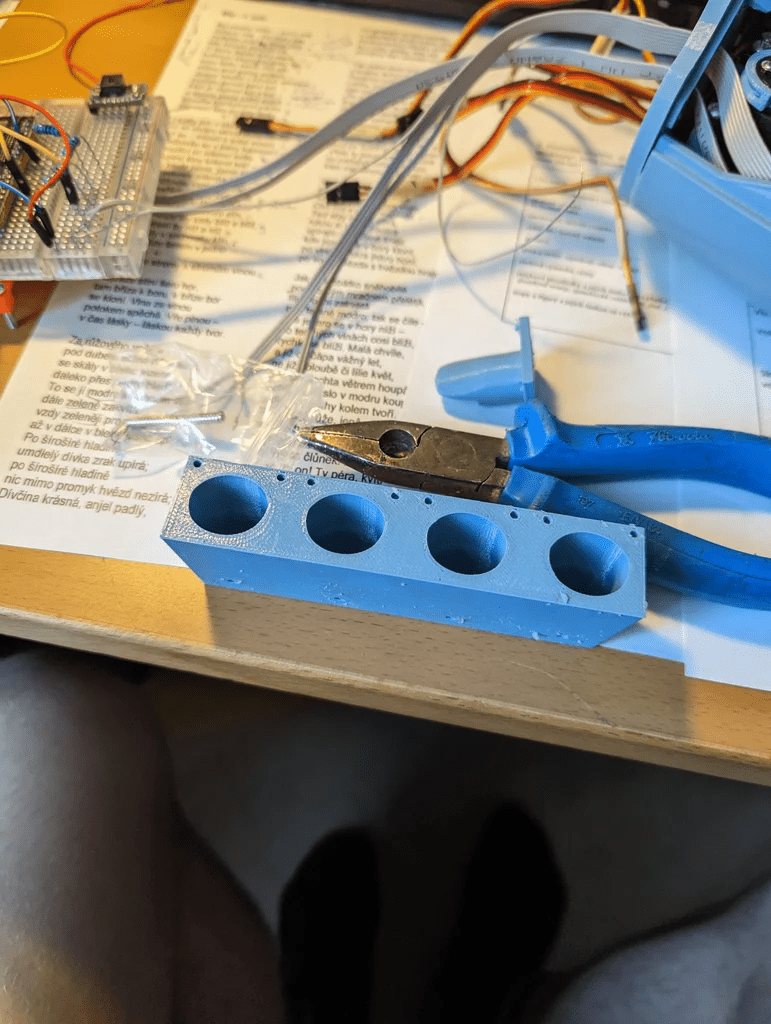
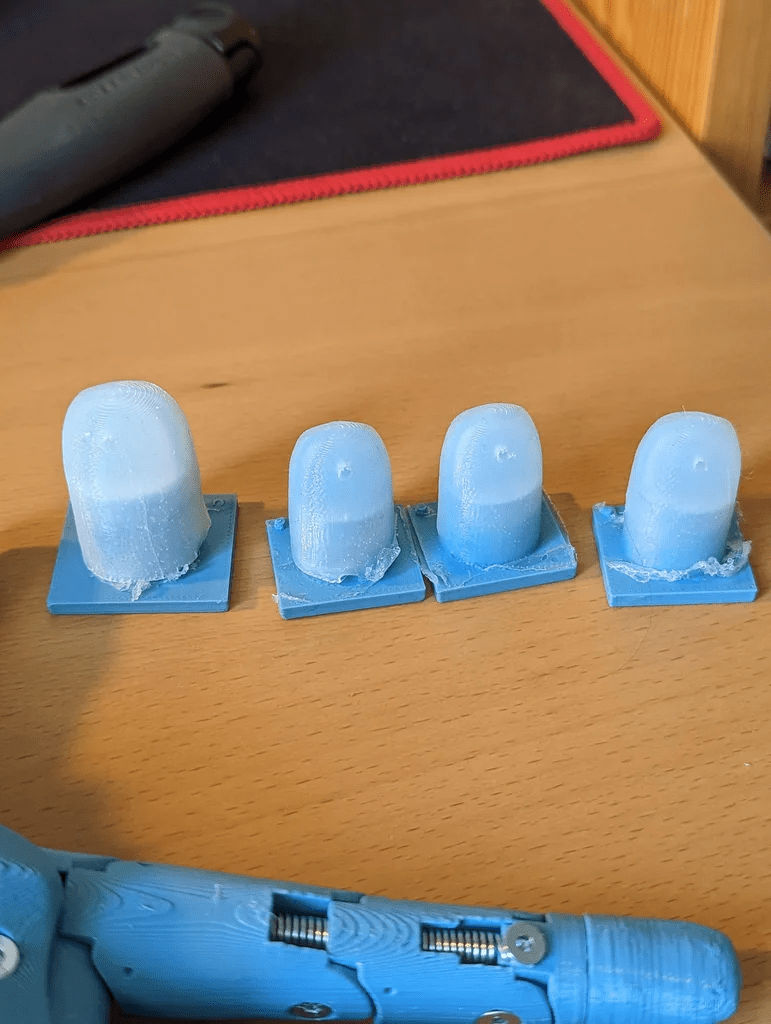
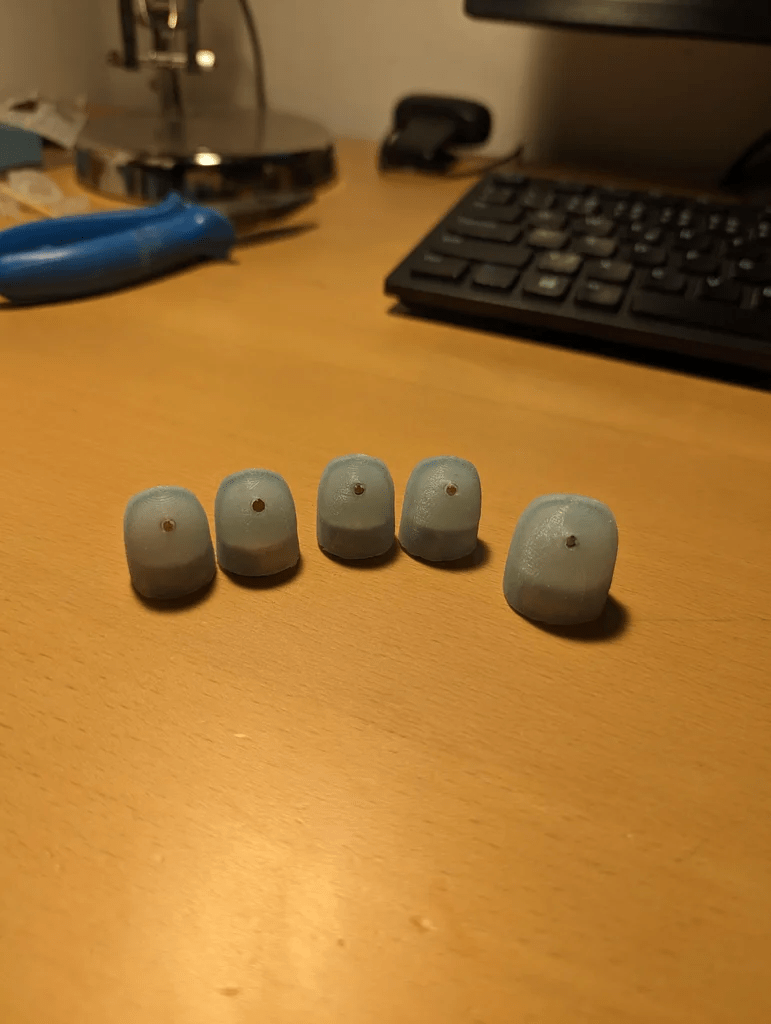
對于指尖來說,使用非常柔軟的硅膠是很重要的,因為霍爾傳感器的讀取有一定的不確定性。硅膠越軟,內(nèi)部的磁鐵運動幅度越大,從而更容易從數(shù)據(jù)中識別。將硅膠部分粘到3D打印出的部件上之后,可以用它來調(diào)整霍爾傳感器的突出程度。
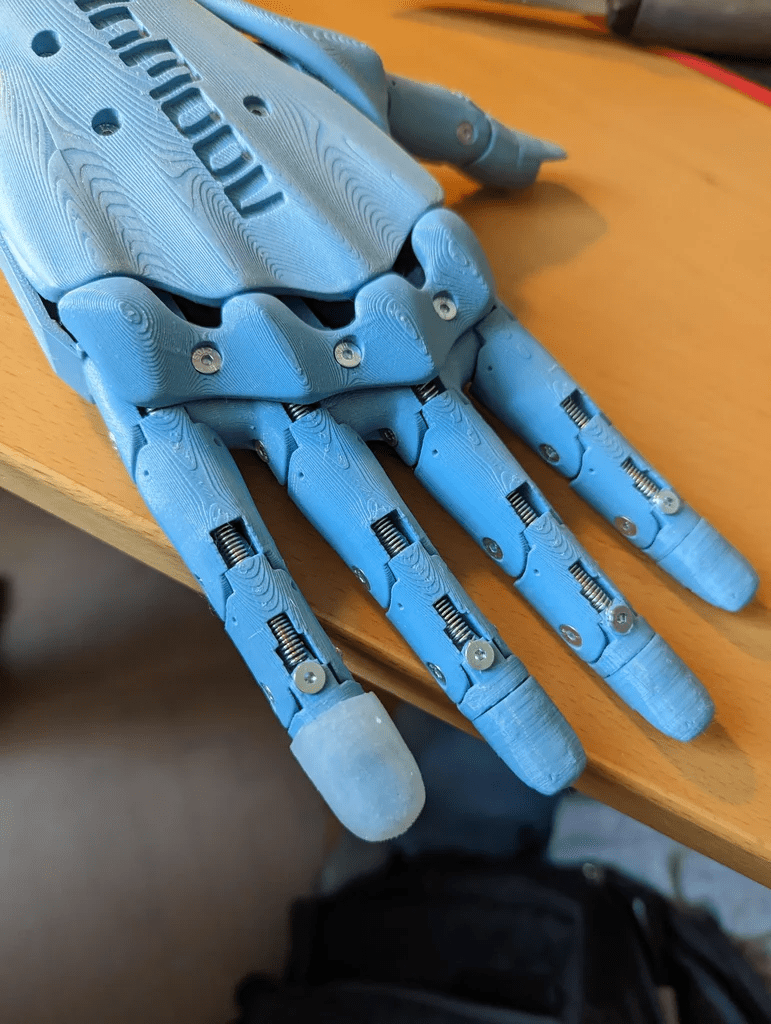
在這一切設(shè)置好之后,強烈建議將霍爾傳感器固定在手指的末端,否則在手指運動過程中,霍爾傳感器可能會稍微移動,從而影響測量結(jié)果。
步驟5:電路
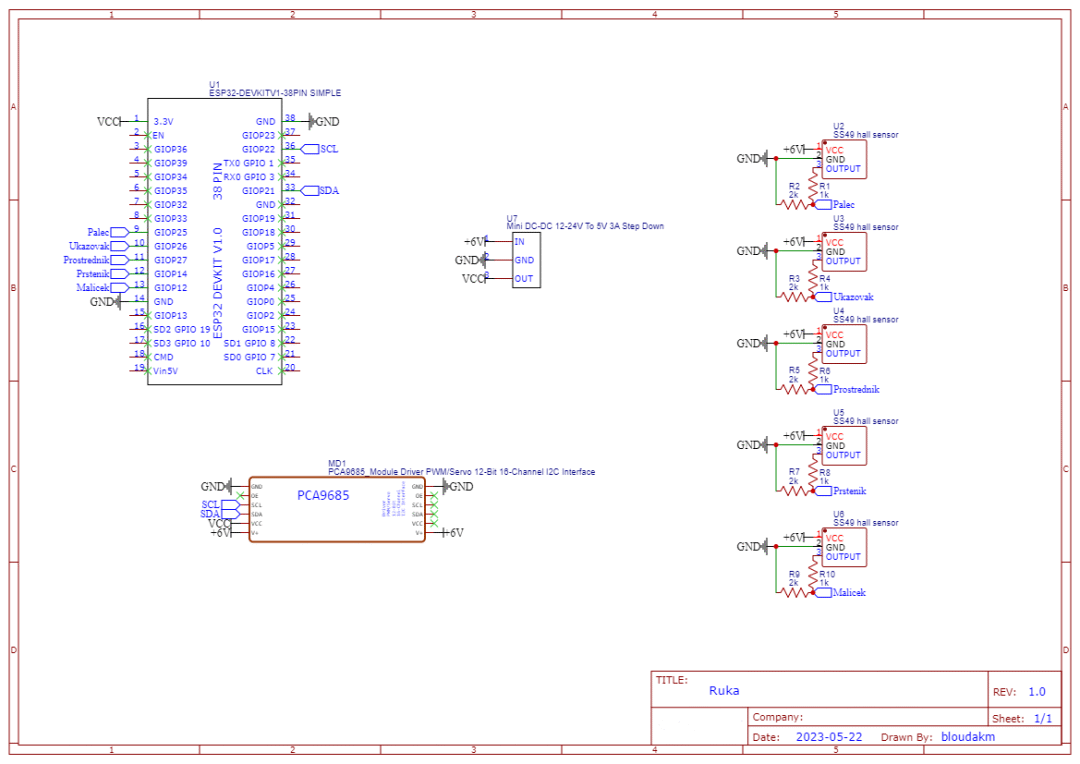
電路方面,使用16路舵機驅(qū)動模塊會帶來顯著的效果,但也存在一些缺點。該驅(qū)動模塊有兩種不同的版本,雖然它們幾乎相同,但在反極性保護(hù)電路(用于電容)所使用的晶體管上有區(qū)別,一個版本可承受約8A電流,而另一個版本僅可承受約0.5A,這遠(yuǎn)低于舵機實際需要的電流。因此,最好不要讓伺服電機通過驅(qū)動模塊供電,或者按照視頻[5]中所述進(jìn)行小改動,并在使用電容時要格外小心。
關(guān)于霍爾傳感器,我們需要使用一個電壓分壓器,因為它輸出的電壓范圍在0V到5V之間,而ESP32只能正確讀取0V到3.3V的ADC值。
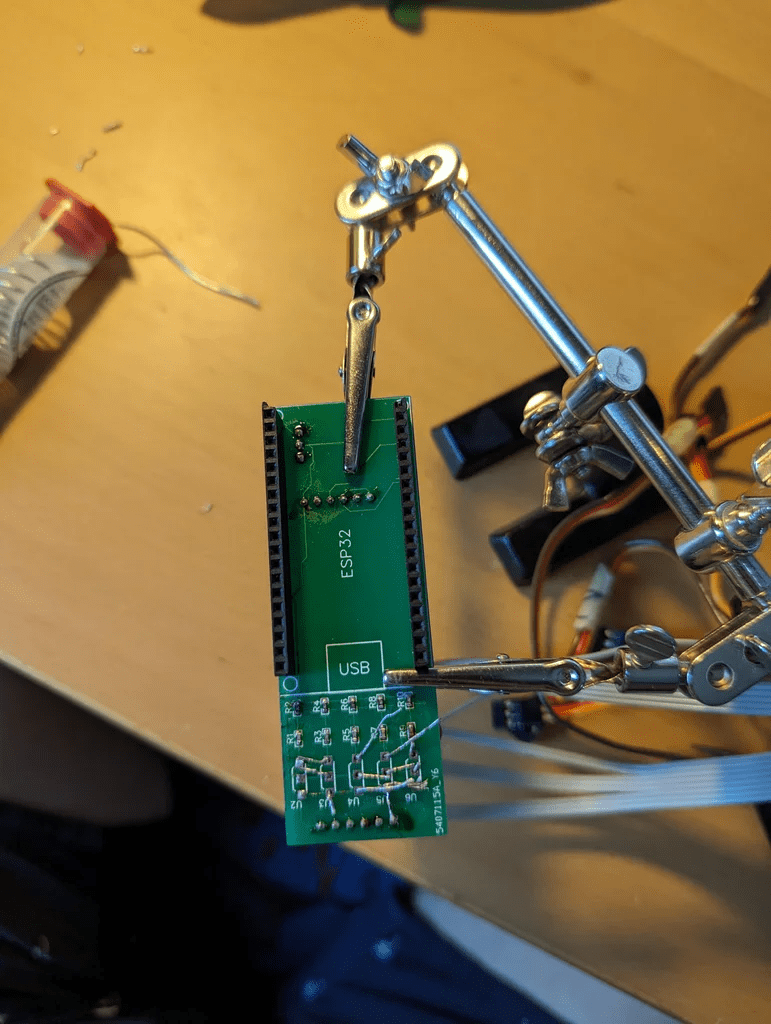
對于整個電路,可以選擇使用面包板,或者更好的是使用定制PCB(作者版本的GitHub鏈接[6])。
步驟6:測試
由于每個伺服電機和霍爾傳感器都略有不同,所以需要對它們進(jìn)行測試。
最重要的是測試霍爾傳感器,因為它們測量的值將決定仿生手是否施加了足夠的壓力。我建議使用Arduino IDE的繪圖功能來繪制數(shù)據(jù),以觀察數(shù)值何時超過自然不確定性范圍。
為此,我們可以使用這個非常簡單的代碼片段:
inthall="Pinnumberyourhallsensorisconnectedto";
voidsetup(){
Serial.begin(115200);
pinMode(hall,INPUT);
}
voidloop(){
Serial.println(analogRead(hall));
delay(10);
}
步驟7:代碼
OpenCV(在VSCode中運行的Python代碼)
就運行在帶有網(wǎng)絡(luò)攝像頭的PC上的代碼而言,我們需要完成兩個主要任務(wù):
第一個任務(wù)是使用OpenCV追蹤手部及其元素。基于這些元素我們可以計算每根手指的位置。
第二個任務(wù)是通過串口將數(shù)據(jù)發(fā)送到ESP32,以便控制伺服電機。這些數(shù)據(jù)可以相對簡化,因為我們不需要發(fā)送精確的角度值,而只需發(fā)送每個手指是否彎曲的信息。因此,我們可以發(fā)送五個0或1,并在末尾加一個符號以便后續(xù)識別每個數(shù)字的索引。
這種方法將手部追蹤和數(shù)據(jù)傳輸簡化為一個二進(jìn)制狀態(tài)系統(tǒng),使得數(shù)據(jù)處理和傳輸更加高效,同時仍能提供足夠的信息來控制仿生手的動作。
首先,我們需要為Python代碼導(dǎo)入以下庫:
importcv2
importmediapipeasmp
importtime
importserial
然后,我們需要創(chuàng)建一個用于處理攝像頭數(shù)據(jù)的類:
classHandDetector():
#Constructoroftheclasswithparametersforthemeasurement
def__init__(self,mode=False,maxHands=1,detectionCon=0.5,trackCon=0.5):
self.mode=mode
self.maxHands=maxHands
self.detectionCon=detectionCon
self.trackCon=trackCon
self.mpHands=mp.solutions.hands
self.hands=self.mpHands.Hands()
self.mpDraw=mp.solutions.drawing_utils
#Functionforfindinganddrawingthehand
deffindHands(self,frame,draw=True):
imgRGB=cv2.cvtColor(frame,cv2.COLOR_BGR2RGB)
self.results=self.hands.process(imgRGB)
ifself.results.multi_hand_landmarks:
forhandLmsinself.results.multi_hand_landmarks:
ifdraw:
self.mpDraw.draw_landmarks(frame,handLms,self.mpHands.HAND_CONNECTIONS)
returnframe
#Functionforfindingeachhandlandmarkanddrawingitsposition
deffindPosition(self,frame,handNo=0,draw=False):
lmList=[]
ifself.results.multi_hand_landmarks:
myHand=self.results.multi_hand_landmarks[handNo]
forid,lminenumerate(myHand.landmark):
h,w,c=frame.shape
cx,cy=int(lm.x*w),int(lm.y*h)
lmList.append([id,cx,cy])
ifdrawandid==0:
cv2.circle(frame,(cx,cy),15,(255,0,255),-1)
returnlmList
接下來定義主函數(shù):
defmain():
#TheprevTimeandcurrentTimeareusedtocalculatetheFPSlater
prevTime=0
currentTime=0
#Arrayforstoringtheinfoaboutthehand
hand=[["Wrist",False],["Index",False],["Middle",False],
["Ring",False],["Thumb",False],["Pinky",False]]
#InitializingtheSerialandopencv
ser=serial.Serial(port="ThenameoftheporttheESP32isconnectedto")
#Ihadtoincludethe"cv2.CAP_DSHOW"becauseIhadissueswiththewebcamloadingonmylinuxmachine
cap=cv2.VideoCapture(0,cv2.CAP_DSHOW)
detector=HandDetector()
#MAINLOOPOFTHECODE#
#Releasingthestuffallocatedforopencv
cap.release()
cv2.destroyAllWindows()
main()
以及代碼的主循環(huán):
while(True):
#Findingthehandsandreadingthepositionofhtelandmarks
ret,frame=cap.read()
frame=detector.findHands(frame)
lmList=detector.findPosition(frame)
iflen(lmList)>0:
j=1
change=False
#Loopwhichchecksifthetopofthefingerisbelowthesecondmosttop
foriinrange(1,6):
ifi==1andlmList[4][1]3][1]andnothand[4][1]:
#Incasethatitistrueitchangesalltheneededdata
hand[4][1]=True
change=True
print(hand[4][0],hand[4][1])
elifi==1andlmList[4][1]>lmList[3][1]andhand[4][1]:
hand[4][1]=False
change=True
print(hand[4][0],hand[4][1])
elifi!=1:
iflmList[i*4][2]>lmList[(i*4)-2][2]andnothand[j][1]:
hand[j][1]=True
change=True
print(hand[j][0],hand[j][0])
eliflmList[i*4][2]4)-2][2]andhand[j][1]:
hand[j][1]=False
change=True
print(hand[j][0],hand[j][0])
ifj==3:
j+=2
else:
j+=1
#Iftherehasbeenanychangeinthestateofthehandthiscodeblockwillrun
ifchange:
msg=""
#Convertsthebooleanvaluesto0sand1s
foriinrange(6):
ifhand[i][1]:
msg+="1"
else:
msg+="0"
#AddstheendingsymbolandsendsthedataovertotheESP32
msg+='\n'
print(msg)
ser.write(msg.encode("Ascii"))
#CalculatestheFPSanddisplaysitontheframe
currentTime=time.time()
fps=1/(currentTime-prevTime)
prevTime=currentTime
cv2.putText(frame,str(int(fps)),(10,70),cv2.FONT_HERSHEY_SIMPLEX,3,(255,0,255),3)
#Showswhatthewebcamseesonaframe
cv2.imshow("frame",frame)
#Ifwepress"q"itquitsrunningtheprogram
ifcv2.waitKey(1)&0xFF==ord("q"):
break
整個代碼 OpenCV:
importcv2
importmediapipeasmp
importtime
importserial
classHandDetector():
def__init__(self,mode=False,maxHands=2,detectionCon=0.5,trackCon=0.5):
self.mode=mode
self.maxHands=maxHands
self.detectionCon=detectionCon
self.trackCon=trackCon
self.mpHands=mp.solutions.hands
self.hands=self.mpHands.Hands()
self.mpDraw=mp.solutions.drawing_utils
deffindHands(self,frame,draw=True):
imgRGB=cv2.cvtColor(frame,cv2.COLOR_BGR2RGB)
self.results=self.hands.process(imgRGB)
ifself.results.multi_hand_landmarks:
forhandLmsinself.results.multi_hand_landmarks:
ifdraw:
self.mpDraw.draw_landmarks(frame,handLms,self.mpHands.HAND_CONNECTIONS)
returnframe
deffindPosition(self,frame,handNo=0,draw=False):
lmList=[]
ifself.results.multi_hand_landmarks:
myHand=self.results.multi_hand_landmarks[handNo]
forid,lminenumerate(myHand.landmark):
h,w,c=frame.shape
cx,cy=int(lm.x*w),int(lm.y*h)
lmList.append([id,cx,cy])
ifdrawandid==0:
cv2.circle(frame,(cx,cy),15,(255,0,255),-1)
returnlmList
defmain():
prevTime=0
currentTime=0
hand=[["Wrist",False],["Index",False],["Middle",False],
["Ring",False],["Thumb",False],["Pinky",False]]
ser=serial.Serial(port="COM3")
cap=cv2.VideoCapture(0,cv2.CAP_DSHOW)
detector=HandDetector()
while(True):
ret,frame=cap.read()
frame=detector.findHands(frame)
lmList=detector.findPosition(frame)
iflen(lmList)>0:
j=1
change=False
foriinrange(1,6):
ifi==1andlmList[4][1]3][1]andnothand[4][1]:
hand[4][1]=True
change=True
print(hand[4][0],hand[4][1])
elifi==1andlmList[4][1]>lmList[3][1]andhand[4][1]:
hand[4][1]=False
change=True
print(hand[4][0],hand[4][1])
elifi!=1:
iflmList[i*4][2]>lmList[(i*4)-2][2]andnothand[j][1]:
hand[j][1]=True
change=True
print(hand[j][0],hand[j][0])
eliflmList[i*4][2]4)-2][2]andhand[j][1]:
hand[j][1]=False
change=True
print(hand[j][0],hand[j][0])
ifj==3:
j+=2
else:
j+=1
ifchange:
msg=""
foriinrange(6):
ifhand[i][1]:
msg+="1"
else:
msg+="0"
msg+='\n'
print(msg)
ser.write(msg.encode("Ascii"))
currentTime=time.time()
fps=1/(currentTime-prevTime)
prevTime=currentTime
cv2.putText(frame,str(int(fps)),(10,70),cv2.FONT_HERSHEY_SIMPLEX,3,(255,0,255),3)
cv2.imshow("frame",frame)
ifcv2.waitKey(1)&0xFF==ord("q"):
break
cap.release()
cv2.destroyAllWindows()
main()
ESP32(Arduino IDE)
我們可以充分利用ESP32是雙核這一特點,類似于PC的代碼,我們同樣需要完成兩項主要工作。
首先是接收來自PC的數(shù)據(jù)。正如前面提到的,數(shù)據(jù)基本上是一個帶有六位二進(jìn)制數(shù)和結(jié)束符的字符串。此外,由于只有在狀態(tài)變化時才會傳輸數(shù)據(jù),我們可以立即將這些值(轉(zhuǎn)換為true或false)分配給相應(yīng)的變量。將這個任務(wù)分配給核心0,而主循環(huán)則在核心1上運行。
第二項工作就是控制手部運動。為此,我們需要不停地檢查這些變量的狀態(tài)是否發(fā)生變化,一旦有變化,伺服電機就會按小步長進(jìn)行線性移動。在每一步后,首先需要檢查變量是否沒有再次變化,并且還要測量霍爾傳感器讀取的值。如果霍爾傳感器的值過高,意味著磁鐵距離手指核心太近,此時也要停止伺服電機的運動。
最初,我們需要用于伺服驅(qū)動的庫,并且還將包含用于I2C通信的Wire庫:
#include
#include
之后,我們需要定義脈沖長度的值,這些值因伺服類型而異,所以強烈建議查找特定伺服的信息或者像這樣測試[7]它們。
//OperatingSpeedofmyServo(6V):0.21sec/60°
#defineSERVOMIN"Yourvalue(minewas70)"//Thisisthe'minimum'pulselengthcount(outof4096)
#defineSERVOMAX"Yourvalue(minewas510)"//Thisisthe'maximum'pulselengthcount(outof4096)
#defineSERVO_FREQ50//Analogservosrunat~50Hzupdates
現(xiàn)在我們必須定義其余要使用到的變量:
//Initializingservodriverobject
Adafruit_PWMServoDriverpwm=Adafruit_PWMServoDriver();
//Index,Middle,Ring,Thumb,Pinky
//"state0"isthestatethehandonthewebcamisinand"state"
//isthestuffhappeningontheactualhand
boolstate0[6]={false,false,false,false,false,false};
boolstate[6]={false,false,false,false,false,false};
//Variablewhichindicatesiftherehasbeenanychangemadetothestate
boolchange=false;
//VariablesneededforreadingthedatafromSerial
charsData;
Stringstate;
//Variableforthehallsensor
//Index,Middle,Ring,Thumb,Pinky
//{pin,measuredvalue,maximumvalue}
//ALLOFTHEMAXVALUESWEREMEASUREDBYMETHUSTHEYWILLMOSTLIKELYNOTBESAMEFORYOU
inthall[5][3]={{26,0,2200},{27,0,2400},{14,0,2300},{25,0,2200},{12,0,2300}};
//Settingtheindexnumbersofeachmotor
intwrist=0;
intthumb=4;
intindex=1;
intmiddle=2;
intring=3;//IMPORTANTthismotorwillrotateintheopositedirection
intpinky=5;//IMPORTANTthismotorwillrotateintheopositedirection
//FunctionforcalculatingthePWMbasedonthedegreeyouwant
intdegToPwm(intdegree){
returnmap(degree,0,320,SERVOMIN,SERVOMAX);
}
//Settingthedegreethresholdsused
intdeg=degToPwm(75);
intdeg1=degToPwm(95);
intdeg2=degToPwm(85);
intstartDeg=degToPwm(180);
接下來,需要定義我們將要使用的函數(shù):
//Initializationofthetask
TaskHandle_trecieveData;
//FunctionwhichreadsthedatafromSerial
voidrecieveDataCode(void*parameter){
for(;;){
//Loopwhichrunswhenthereisamessagesent
while(Serial.available()){
//Readingbyeachcharacter
sData=Serial.read();
//Ifthecharacteristhelineendingsymbolweknowitistheendofthemessage
if(sData=='\n'){
//Loopforconvertingthestring0sand1stoboolean
for(inti=0;i6;i++){
state0[i]=state.substring(i,i+1).toInt();
}
//Resetingthestatetemporaryvariable
state="";
//Showingachangeinstatehappened
change=true;
break;
}else{//Ifthecharacterisnotthelineendingsymbolweaddittothetemporarystate
state+=sData;
}
}
delay(10);
}
}
//Functionforactuallymovingtheservos
voidmoveFinger(intfingerId,boolflex,intiteration){
//Becausetheringandpinkymotorsmoveinoppositedirection
//wehavetocheckwhichmotorswearemoving
if(fingerId!=ring&&fingerId!=pinky){
//Wealsoneedtocheckifwewantthefingertoflexorstraighten
if(flex){
//Moreoverthethumbmovesalittlelesssowealsocheckforthat
if(fingerId==thumb){
//Becausewewanttobeabletocontrolthemovementthroughoutwehaveto
//divideitintosmallerparts
floatfPwm=SERVOMIN+(float(103)*float(iteration))/float(130);
//Butwealsohavetomakesuretoconvertbacktointbecausefloatwould
//notbeacceptedbypwmfunction
intiPwm=round(fPwm);
pwm.setPWM(fingerId,0,iPwm);
}else{//Ifthefingerisnotthethumbwejustmoveit
pwm.setPWM(fingerId,0,SERVOMIN+iteration);
}
}else{//Forthecasethatisretractingwehavetojustdotheopposite
if(fingerId==thumb){
floatfPwm=deg-(float(103)*float(iteration))/float(130);
intiPwm=round(fPwm);
pwm.setPWM(fingerId,0,iPwm);
}else{
pwm.setPWM(fingerId,0,deg1-iteration);
}
}
}elseif(fingerId==ring||fingerId==pinky){
//Inthecaseoftheringorpinkyfingerwedoagainthesame
if(flex){
pwm.setPWM(fingerId,0,startDeg-iteration);
}else{
pwm.setPWM(fingerId,0,deg2+iteration);
}
}
}
補上設(shè)置和循環(huán)功能:
voidsetup(){
//StartingSerialonthesamefrequencyasonthePC
Serial.begin(9600);
//AssigningthepinModetoallpinsconnectedtohallsensor
for(inti=0;i5;i++){
pinMode(hall[i][0],INPUT);
}
//Setupandstartingtheservodriver
pwm.begin();
pwm.setOscillatorFrequency(27000000);
pwm.setPWMFreq(SERVO_FREQ);
delay(10);
//Pinningthecreatedtasktocore0
xTaskCreatePinnedToCore(
recieveDataCode,
"recieveData",
10000,
NULL,
0,
&recieveData,
0);
delay(500);
}
voidloop(){
//Oncetherehasbeenachangeinthestatethiscodeblockwillrun
if(change){
//Loopingfirstlythroughthetotalstepsoftheservos
for(inti=5;i135;i+=5){
//Secondlythroughallofthehallsensorsandreadingthevalues
for(intk=0;k5;k++){
hall[k][1]=analogRead(hall[k][0]);
//Ifthemeasuredvalueisgreaterthanmaximumvaluewestopthemovement
if(hall[k][1]>hall[k][2]){
state1[k+1]=state0[k+1];
}
}
//Thirdlythroughalltheservomotors
for(intj=0;j6;j++){
if(state0[j]!=state1[j]){
//IfthestateonthePCdoesnotmatchtheoneontheesp32we
//callthefunctionformovingtherespectivefinger
moveFinger(j,state0[j],i);
}
}
//Thisdelayisveryimportantasitsetsthespeedofthemovements
delay(17);
}
//Attheandwemakethestatevariablesequalagain
for(inti=0;i6;i++){
state1[i]=state0[i];
}
}
delay(100);
}
ESP32的完整代碼:
#include
#include
#defineSERVOMIN"Yourvalue"
#defineSERVOMAX"Yourvalue"
#defineSERVO_FREQ50
Adafruit_PWMServoDriverpwm=Adafruit_PWMServoDriver();
boolstate0[6]={false,false,false,false,false,false};
boolstate1[6]={false,false,false,false,false,false};
boolchange=false;
charsData;
Stringstate;
inthall[5][3]={{26,0,2200},{27,0,2400},{14,0,2300},{25,0,2200},{12,0,2300}};
intwrist=0;
intthumb=4;
intindex=1;
intmiddle=2;
intring=3;
intpinky=5;
intdegToPwm(intdegree){
returnmap(degree,0,320,SERVOMIN,SERVOMAX);
}
intdeg=degToPwm(75);
intdeg1=degToPwm(95);
intdeg2=degToPwm(85);
intstartDeg=degToPwm(180);
TaskHandle_trecieveData;
voidrecieveDataCode(void*parameter){
for(;;){
while(Serial.available()){
sData=Serial.read();
if(sData=='\n'){
for(inti=0;i6;i++){
state0[i]=state.substring(i,i+1).toInt();
}
state="";
change=true;
break;
}else{
state+=sData;
}
}
delay(10);
}
}
voidmoveFinger(intfingerId,boolflex,intiteration){
if(fingerId!=ring&&fingerId!=pinky){
if(flex){
if(fingerId==thumb){
floatfPwm=SERVOMIN+(float(103)*float(iteration))/float(130);
intiPwm=round(fPwm);
pwm.setPWM(fingerId,0,iPwm);
}else{
pwm.setPWM(fingerId,0,SERVOMIN+iteration);
}
}else{
if(fingerId==thumb){
floatfPwm=deg-(float(103)*float(iteration))/float(130);
intiPwm=round(fPwm);
pwm.setPWM(fingerId,0,iPwm);
}else{
pwm.setPWM(fingerId,0,deg1-iteration);
}
}
}else/*if(fingerId==ring||fingerId==pinky)*/{
if(flex){
pwm.setPWM(fingerId,0,startDeg-iteration);
}else{
pwm.setPWM(fingerId,0,deg2+iteration);
}
}
}
voidsetup(){
Serial.begin(9600);
for(inti=0;i5;i++){
pinMode(hall[i][0],INPUT);
}
pwm.begin();
pwm.setOscillatorFrequency(27000000);
pwm.setPWMFreq(SERVO_FREQ);
delay(10);
xTaskCreatePinnedToCore(
recieveDataCode,
"recieveData",
10000,
NULL,
0,
&recieveData,
0);
delay(500);
}
voidloop(){
if(change){
for(inti=5;i135;i+=5){
for(intk=0;k5;k++){
hall[k][1]=analogRead(hall[k][0]);
if(hall[k][1]>hall[k][2]){
state1[k+1]=state0[k+1];
}
}
for(intj=0;j6;j++){
if(state0[j]!=state1[j]){
moveFinger(j,state0[j],i);
}
}
delay(17);
}
for(inti=0;i6;i++){
state1[i]=state0[i];
}
}
delay(100);}
原文地址:https://www.instructables.com/Bionic-Hand-Controlled-by-OpenCV/
項目作者:bloudakm
-
傳感器
+關(guān)注
關(guān)注
2564文章
52645瀏覽量
764020 -
OpenCV
+關(guān)注
關(guān)注
32文章
642瀏覽量
42466 -
仿生手
+關(guān)注
關(guān)注
0文章
14瀏覽量
10238
發(fā)布評論請先 登錄
意大利新型仿生手,體驗“逼真”的觸感!
【開源項目】做一只由 OpenCV 控制的仿生手
分享仿生手的設(shè)計方案

Youbionic仿生手變身多臂超人不再是夢!
如何制作一只用蒸汽驅(qū)動的能航行的小船?
觸控手機可穿戴仿生手將投入量產(chǎn)
3D打印定制仿生手臂,僅需10小時即可完成
英國游戲玩家在廠商幫助下獲得新仿生手臂
中國科學(xué)家研發(fā)新型仿生手術(shù)縫線
arduino nano作為控制器的仿生手

通過基于CNN的EMG識別進(jìn)行實時仿生手臂控制


 工商網(wǎng)監(jiān)
評論